Software defined radio (SDR) has definitely been a fun way to spend some hours over the past year or two. In this article I wanted to provide a quick guide to getting started with SDR, and doing so on the Rock64 with Armbian installed. As an added bonus, the instructions are very similar (if not the same from what I remember) to installing on the Raspberry Pi with Raspbian.
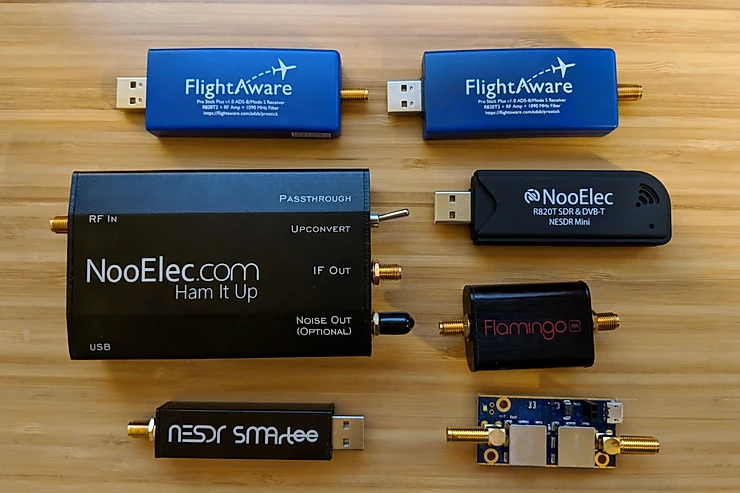
Various Inexpensive SDRs and Filters, and a “converter”
Installing the Libraries and ToolsBefore you get started with the drivers, your best best is to start with a fresh boot where you have not yet plugged in your SDR. If you’ve already plugged it in you can reboot with the device unplugged, or proceed “at your own risk” until the note of when you really need to reboot.
The best luck I’ve had with my cheap SDRs and Linux (typically on a RaspberryPi) has been by using the osmocom tools. It is relatively easy to build and install on Ubuntu/Debian (including Raspbian) systems.
To prepare your system to build the osmocom drivers you’ll need to install the following packages:
sudo apt update
sudo apt install -y build-essential cmake git libusb-1.0-0-dev
As an aside, I typically like to store my “local” utilities in my home directory under $HOME/local/… rather than just $HOME/src/ or $HOME/bin/. Feels a bit cleaner. So, if you see that here you now know why.
Once you’ve installed your pre-reqs, run the following commands to download, build, and install (as root) the related libraries and tools:
mkdir -p $HOME/local/src
cd $HOME/local/src
git clone git://git.osmocom.org/rtl-sdr.git
cd rtl-sdr/
mkdir build
cd build
# PLEASE NOTE that with the flag below, devices will be available to non-root users!
cmake ../ -DINSTALL_UDEV_RULES=ON
# The next command includes '-j`nproc`' which will help utilize all of the cores on your device (AKA faster build)
make -j`nproc`
sudo make install
sudo ldconfig
To prevent a conflict between the system wanting to use your SDR device as a video input device (what many of the base chips were designed for), you’ll also need to tall your OS not to load the drivers it thinks are important automatically. You can do so with the following command:
echo "blacklist dvb_usb_rtl28xxu" | sudo tee /etc/modprobe.d/blacklist-rtlsdr.conf
(This is the point where, if you didn’t start with the device unplugged, you’ll definitely want to reboot your system.)
Now, plug in your device and run the following command:
rtl_test -t
If everything went smoothly you should see a screen similar to the one below. (Please note that in the test below I attached multiple SDRs to the device; the FlightAware Pro Stick Plus, the NooElec R820T SDR NESDR Mini, and the NooElec NESDR SMArtee.
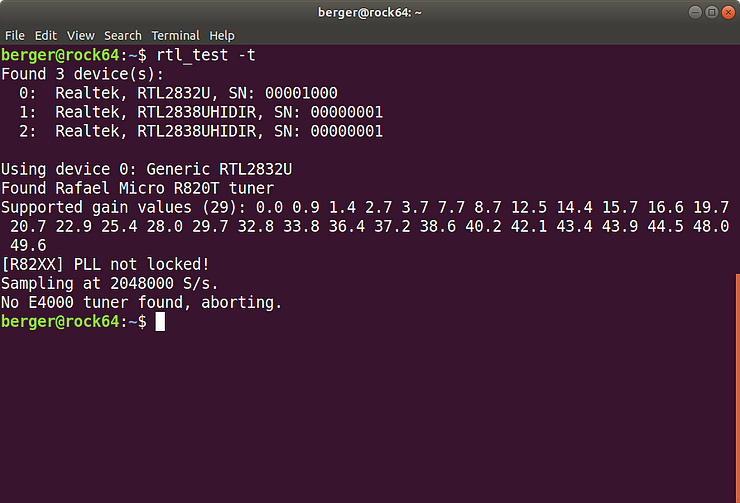
The “PLL not locked” and “No E4000 tuner not found” messages are normal… in that at least I’ve seen them quite a bit and had no issues.
Next Steps
Now, if this was a tutorial for setting up SDR on a local machine I’d tell you to install gqrx and get started graphically. (And, you can do so easily by checking out the guide below in the “extra credit” section.) However, we want to be able to receive our signals remotely over the network so the next installment will pick up there!
Extra Credit: A more thorough guide on SDR w/ Linux